
Simple SSH Tunnel Guide - Part 1
Building the Gateway
This post describes the first of three parts of my Simple SSH Tunnel Guide. The goal of this post is to get new server up and running in AWS to act as a gateway for SSH tunneling.
Step 1 - Launch New EC2 Instance
Short Version
If you already know your way around AWS, then all you need to do for this step is the following:
- Create a new
t2.microinstance running Ubuntu - Configure the Security Group to include a new Custom Rule to allow incoming traffic on port
443 - Generate a new SSH key pair and save the private key to a folder called
/tmp/tunnelon your workstation
Once the new instance is launched, the key file downloaded and the public IP address is noted, continue on to Step 2.
Long Version
Please skip to Step 2 if you are already familiar with creating new EC2 instances on
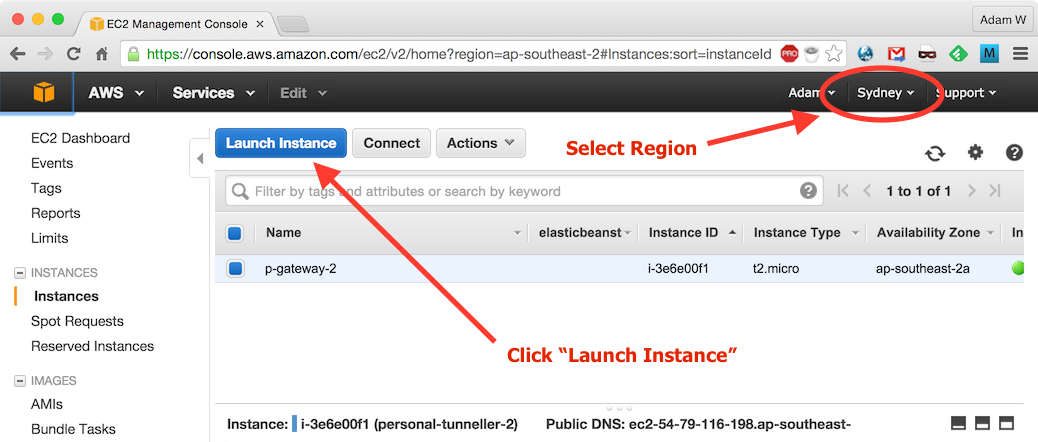
Navigate to your preferred Amazon region and click Launch Instance:
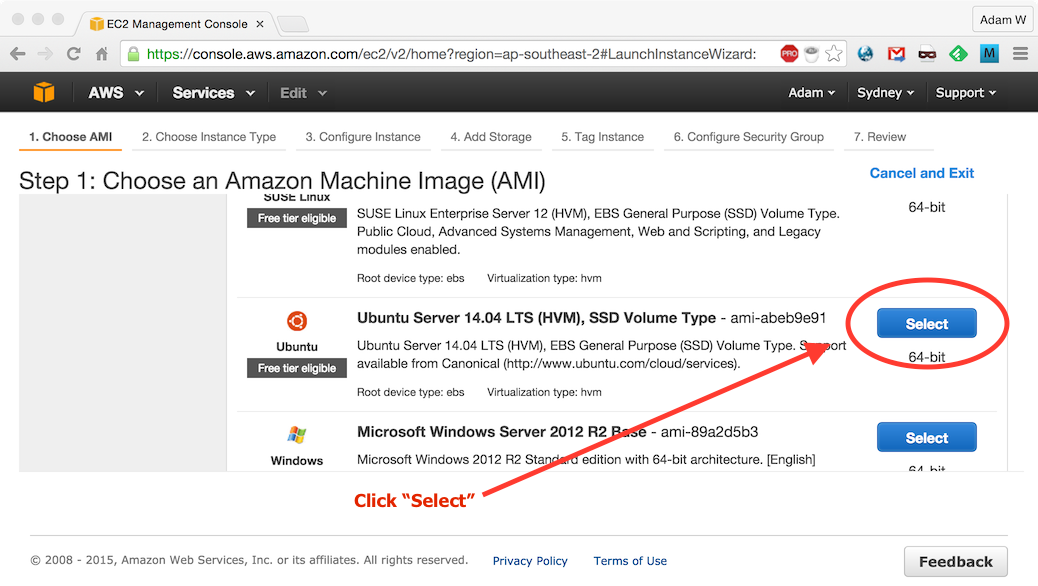
Select Ubuntu as the AMI:
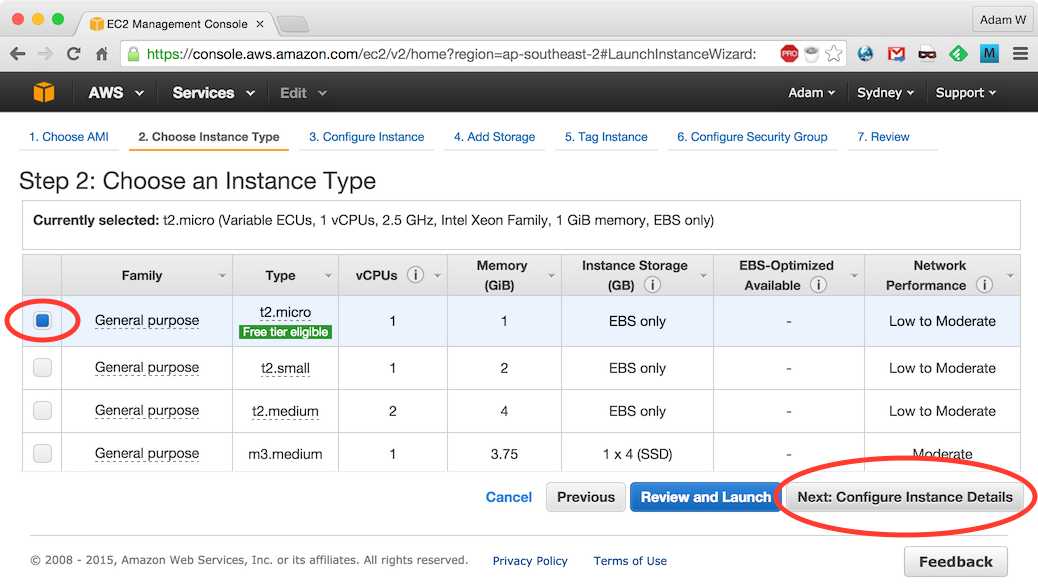
Ensure t2.micro is selected and click Next: Configure Instance Details:
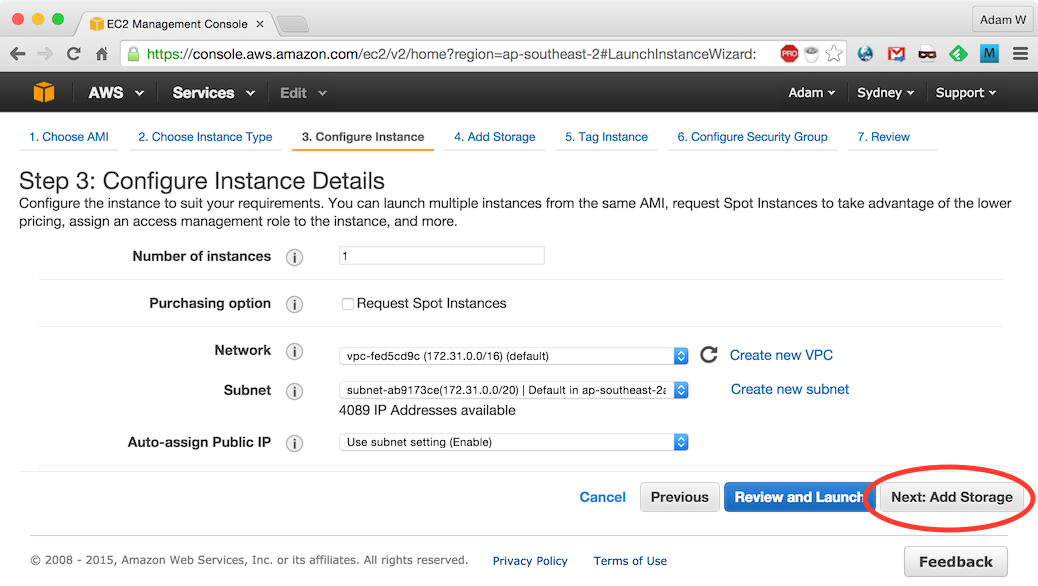
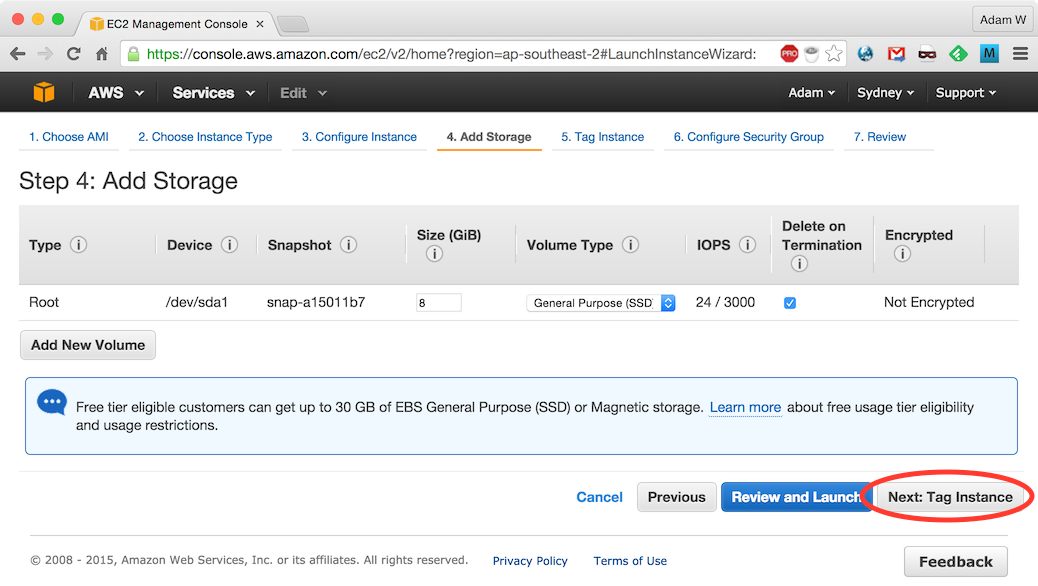
Leave default instance values and click Next: Add Storage:
Leave default storage values and click Next: Tag Instance:
Enter name
tunnel-test-1and click Next: Configure Security Group: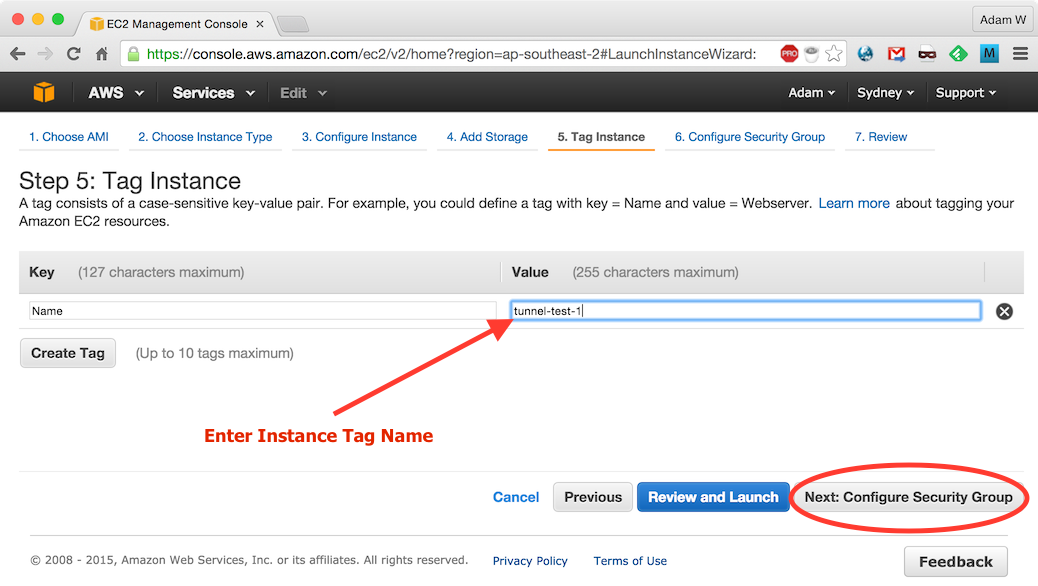
Click Add Rule and create new Custom TCP rule for port
443and click Review and Launch: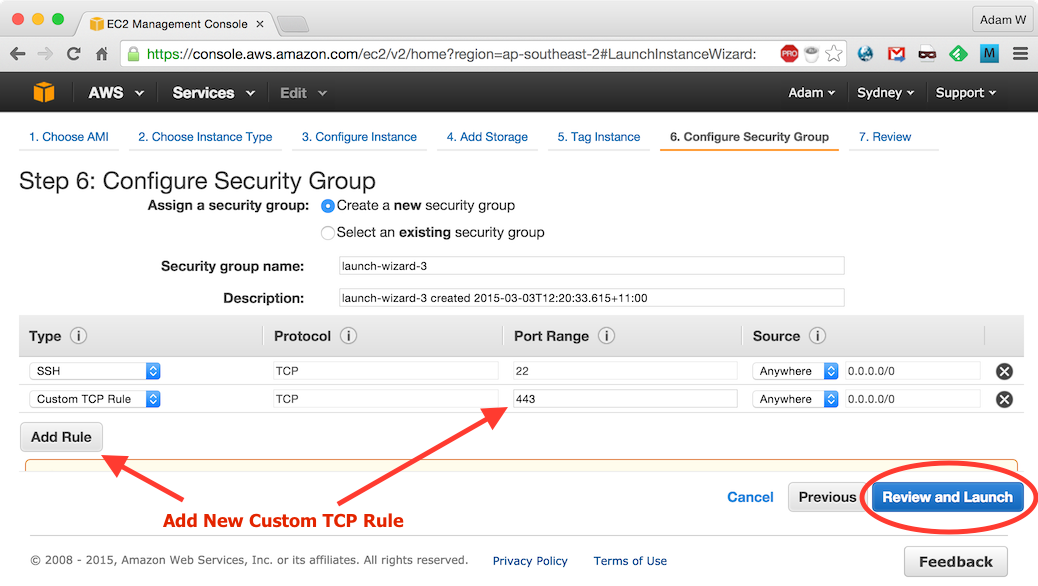
Review instance details and click Launch:

Select Create a new key pair, enter
tunnel-key-1as the Key pair name and click Download Key Pair: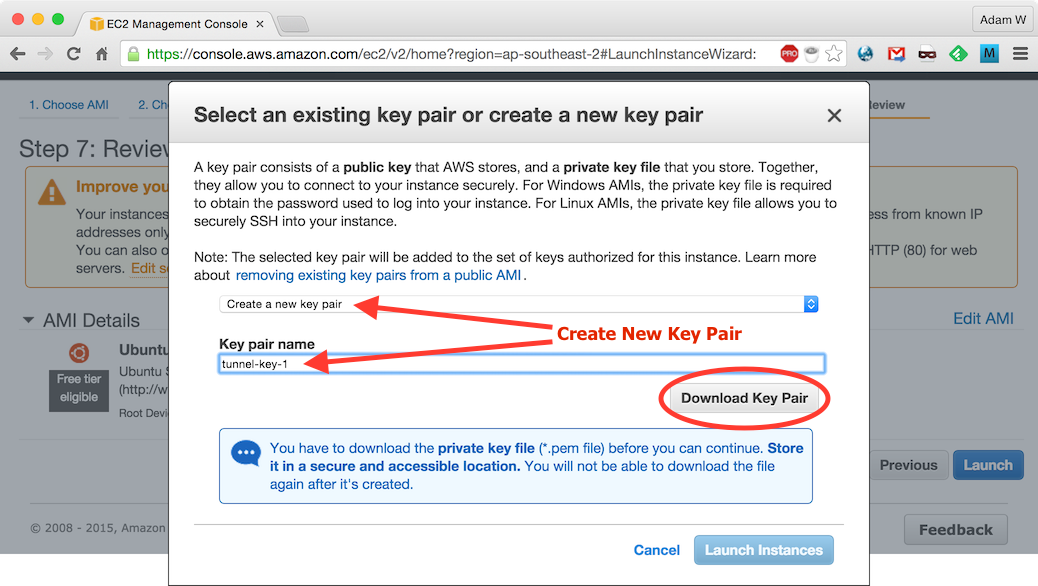
Save the tunnel-key-1.pem file to a new folder on your workstation called
/tmp/tunnel, then click Launch Instance: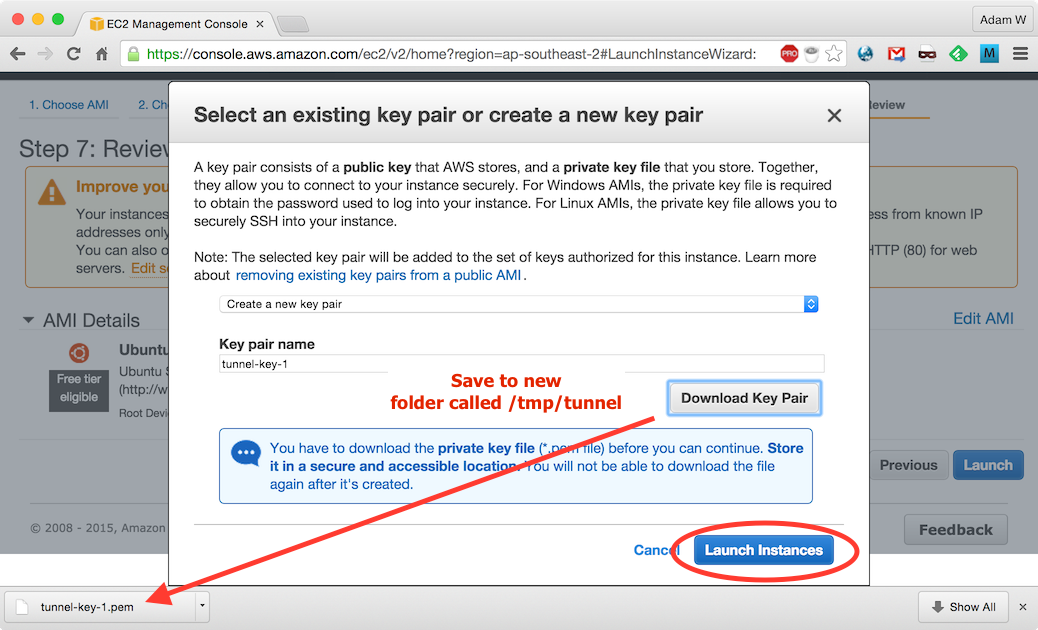
Once launched, navigate back to the EC2 Services dashboard and note the status and the IP address of the new
tunnel-test-1instance: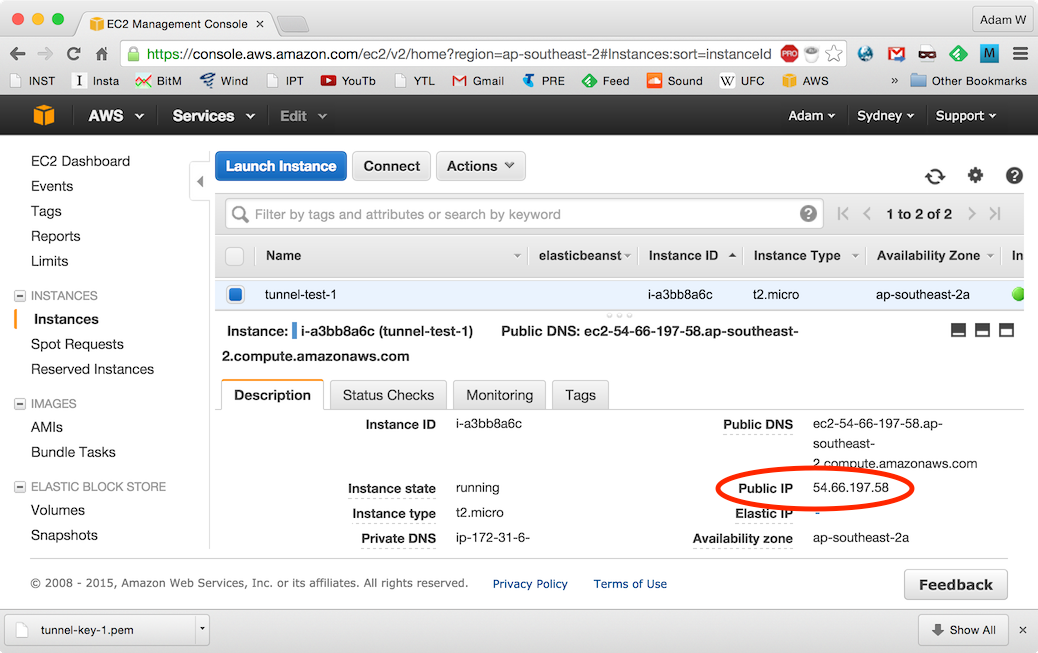
Step 2 - Configure SSH On EC2 Instance
With the new gateway service up and running on Amazon, the next step is to prepare it to receive SSH connections on port 443.
Ensure the
tunnel-key-1.pemkey file, downloaded from Amazon to a new/tmp/tunnelfolder on your workstation, has the correct permissions by running:chmod 600 /tmp/tunnel/tunnel-key-1.pemUsing the key file, log into gateway instance from your workstation using the following:
export GATEWAY=54.66.197.58
ssh ubuntu@${GATEWAY} -i /tmp/tunnel/tunnel-key-1.pem
Where
GATEWAYpoints to the IP address that was noted in Step 1. If successful, you will be presented with the command prompt of the new instance: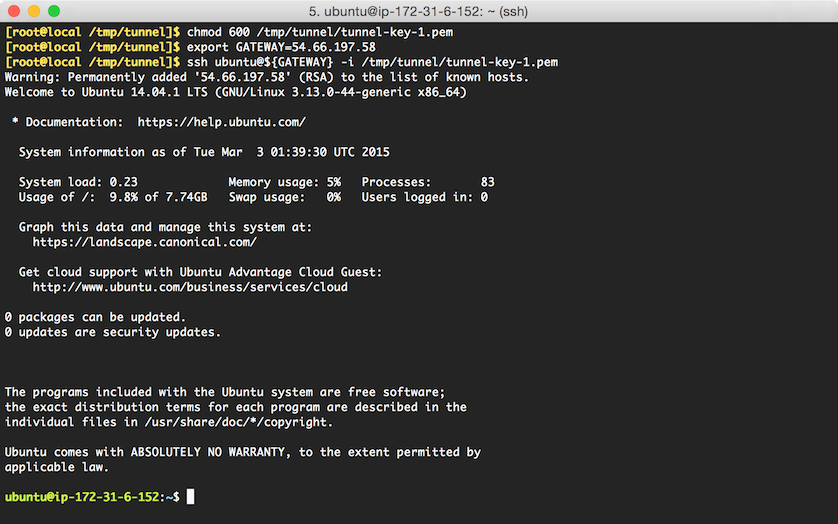
Switch to
rootby runningsudo su, then open the sshd config file for editing usingvior similar:vi /etc/ssh/sshd_configAdd an additional
Port 443configuration directive underneath the existingPort 22declaration and save the file: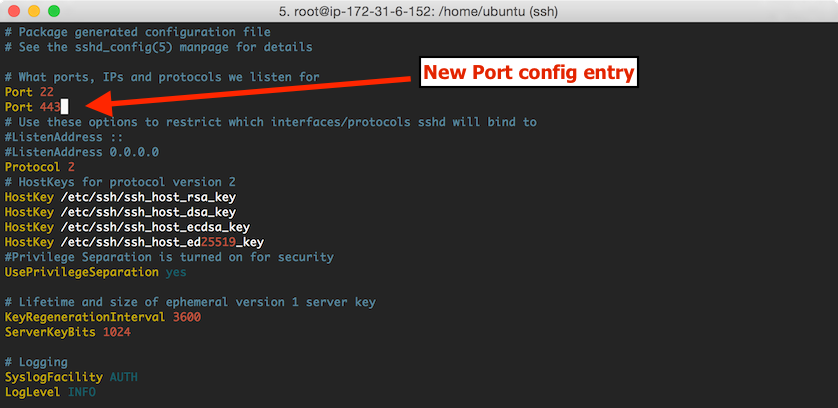
Restart the
sshservice by runningservice ssh restart: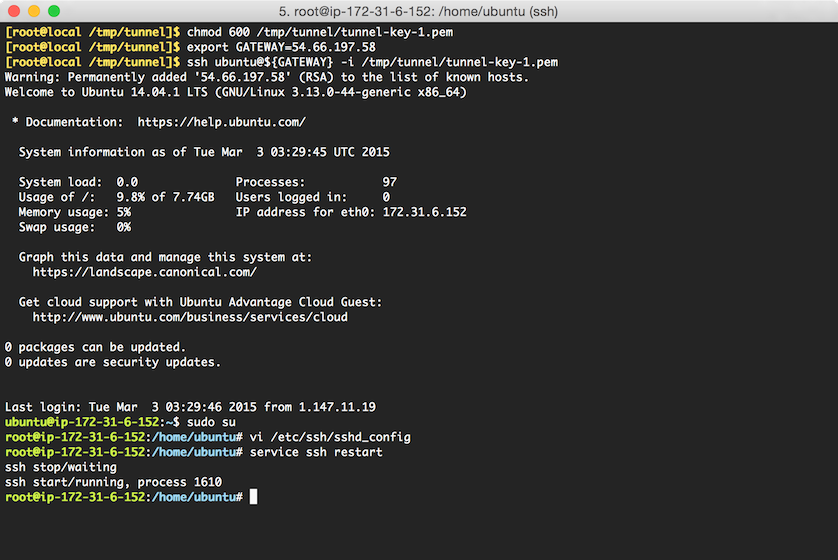
To allow the
rootaccount to SSH directly into the server, edit the/root/.ssh/authorized_keysfile and remove the comment at the beginning of the first line, so that the line starts withssh-rsa AAA...:
After editing, the contents of the
/root/.ssh/authorized_keysfile should look something like this:
Check that
rootaccount can now ssh into the gateway on port443by running:ssh -p 443 root@${GATEWAY} -i /tmp/tunnel/tunnel-key-1.pemA successful connection will display a command prompt for the
rootaccount: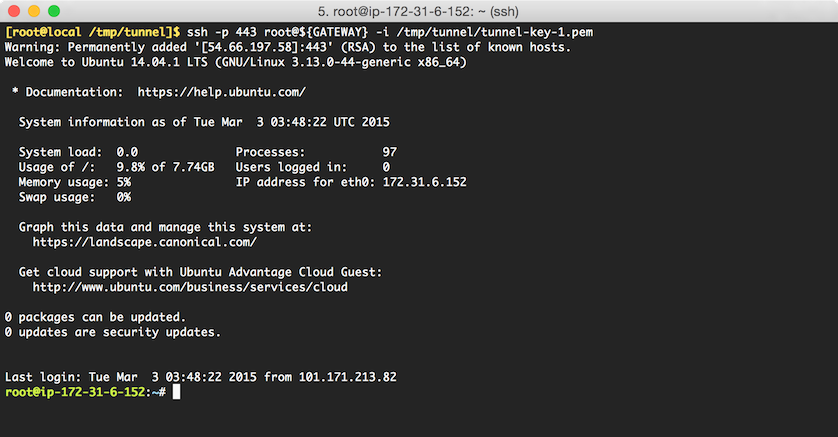
Step 3 - Add Chatty Script to Gateway
This script is used by both the local and remote machines to maintain persistent connections to the gateway. When executed, the script outputs a tiny bit of text at random intervals, making it appear to be an active, healthy connection to the surrounding infrastructure, which helps reduce the risk that the connection will be terminated. I have found this method to be sufficient to keep the tunnel connection maintained for weeks on end.
Create this script as follows:
Log in to the gateway server as
root, and create a new file called/root/chatty.shwith the following contents:#!/bin/bash set -e WHOISIT=not_sure if [ $# == 1 ]; then WHOISIT=$1 fi while true; do R=$(( ( RANDOM % 30 ) + 11 )) printf "%14s : $R s\n" $WHOISIT sleep $R doneEnsure the script is executable by running:
chmod +x /root/chatty.shTest that the script runs by executing
/root/chatty.sh testingThe output should look something like this:
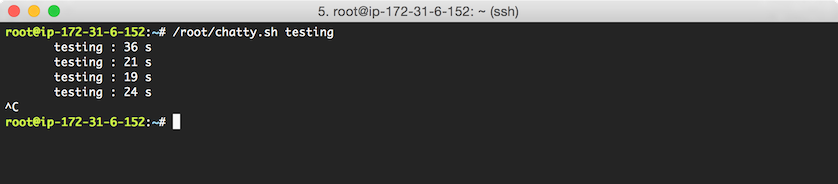
Kill the process by hitting
CTRL-C.The gateway server is now ready to persist SSH connections.
Next Step
Please continue on to Part 2 - The Remote Server for the next part of this guide.